Why Proper Fireplace Flame Adjustment Matters
Fireplace flame adjustment is the key to getting those perfect yellow and orange flames that create a cozy atmosphere while ensuring your fireplace runs safely and efficiently. Whether your flames are too blue, too low, or dancing around more than they should, a few simple adjustments can transform your fireplace experience.
Quick Answer for Fireplace Flame Adjustment:
- Turn off your fireplace and let it cool completely
- Locate the control knob (usually marked High/Low) near the gas valve
- Adjust flame height by turning the knob gradually
- Fine-tune flame color using the air shutter – close it for more yellow/orange flames
- Wait 30 minutes after adjustments to see full results
- Call a professional if flames stay blue after 30 minutes or if you smell gas
The research shows that lowering the air input will give you those desirable orange and yellow flame tips, while blue flames often indicate too much air getting to the burner. Most homeowners can make basic adjustments safely, but it’s important to know when to call for help.
As Colin Matei, owner of Clean Air Heating & Cooling, I’ve helped countless Bellingham area families perfect their fireplace flame adjustment over my years in the HVAC industry. My experience has shown me that proper flame adjustment not only creates better ambiance but also ensures your fireplace operates safely and efficiently.

Before You Begin: Safety and Preparation
Before we get to the exciting part of creating those perfect dancing flames, we need to talk about something that’s absolutely critical: safety first. I’ve been working with gas appliances for years here in Bellingham, and I can’t stress enough how important it is to respect these systems. Gas fireplaces are wonderful, but they demand our careful attention.
The very first thing you need to do is turn off your fireplace completely and let it cool down. I know it might seem obvious, but you’d be surprised how many people skip this step! The glass front on your fireplace gets incredibly hot – we’re talking “ouch, that really hurt” hot. Give it plenty of time to cool until you can barely feel any warmth when you hold your hand near it.
While you’re waiting, take a moment to locate your gas supply valve. This is your emergency stop button if anything goes wrong. If you ever smell gas – even just a hint – turn off that valve immediately and give us a call. It’s always better to be safe than sorry when it comes to gas leaks.
Here’s something that’s non-negotiable: never operate your fireplace without the glass door in place. This isn’t just a suggestion from your manufacturer’s manual – it’s a critical safety feature, especially for direct vent systems. The glass door helps maintain proper ventilation and keeps dangerous gases from entering your home.
Understanding Normal Flame Characteristics
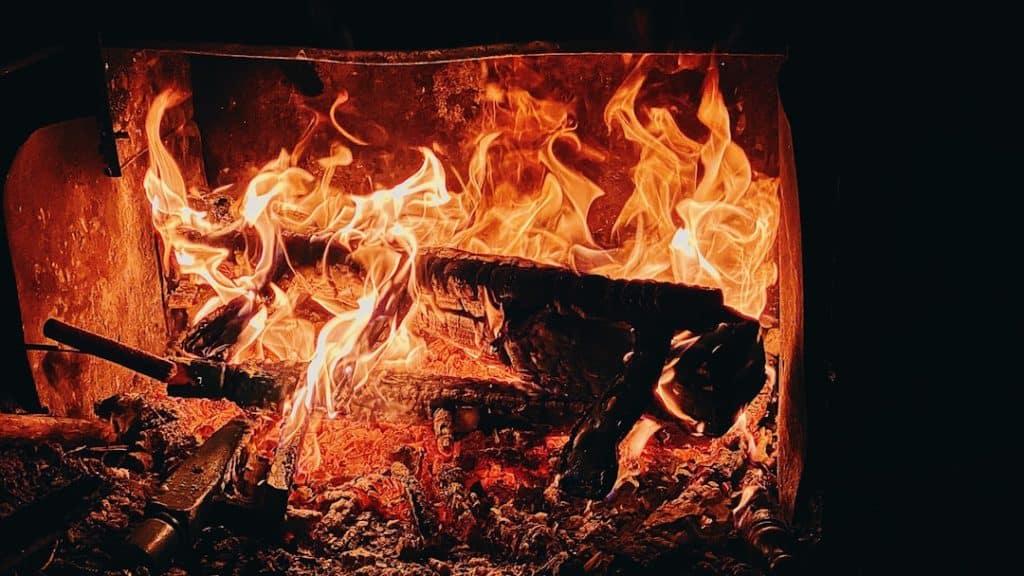
So what exactly should your flames look like when everything’s working perfectly? The ideal flame color starts with a nice blue base and transitions to those beautiful yellow and orange tips that dance and flicker. This color combination tells you that your air-to-fuel ratio is just right for both safety and ambiance.
Your flames should be steady but lively – standing about 3-4 inches tall off your logs or burners. Don’t worry if they’re completely blue when you first light up your fireplace. It’s totally normal for flames to start blue during the first few minutes as dust or residues burn off.
But here’s the key: after about 30 minutes of operation, you should see those gorgeous yellow and orange flame tips. If your flames are still predominantly blue after half an hour, that’s when you know it’s time for some fireplace flame adjustment.
You might also notice some sounds coming from your unit, and most of these are perfectly normal. That gentle whisking sound from the pilot flame? Normal. The dull clicking as your gas control valve cycles on and off? That’s just your system doing its job. Even those little ticking and cracking sounds as your fireplace heats up and cools down are nothing to worry about – it’s just different parts expanding and contracting at their own pace.
Finding Your Fireplace Manual
Your fireplace manual is like having a personal guide for your specific system, and trust me, you’ll want to have it handy. Every model is a little different, and the manual contains the exact instructions for your unit – plus it helps you avoid accidentally voiding your warranty.
The tricky part is actually finding your manual if you’ve misplaced it. Start by looking for the rating plate on your fireplace. This little metal plate has your model number and serial number, and it’s usually tucked away inside the control compartment or behind that decorative front panel. Sometimes manufacturers hide it near the gas valve area.
Once you have your model number, head to your manufacturer’s website. Most companies make their manuals available for download, which is incredibly convenient. You can also find helpful resources like this User Guide that covers general fireplace operation.
Understanding your specific fireplace type is crucial because direct vent and B-vent systems work quite differently. Direct vent fireplaces are completely sealed and pull their combustion air from outside, while B-vent systems use air from inside your home. These differences affect how you approach any adjustments and why following your specific manual is so important.
Don’t skip this step – having the right information for your exact model will make your fireplace flame adjustment much smoother and safer.
A Step-by-Step Guide to Fireplace Flame Adjustment
Now that we’ve covered the crucial safety aspects and the importance of your manual, let’s get down to the practical steps of fireplace flame adjustment. Don’t worry – this is actually easier than you might think, and the results are totally worth it!
Most gas fireplaces give you several ways to control your flames. You might have manual control knobs right on the unit, a remote control for convenience, wall switches for that built-in look, or even a thermostat mode that automatically maintains your desired temperature. Modern systems make it pretty simple to get the perfect flame without crawling around on the floor every time.
Here’s something interesting: if your remote is set to thermostat mode, your fireplace will only kick on when the room gets about two degrees warmer than your setting. So don’t panic if it doesn’t fire up immediately – it’s just being smart about energy use!
Step 1: Locate and Access the Controls
Time to play detective and find where all the magic happens. Your fireplace should be completely off and cool to the touch before you start poking around.
Removing the decorative front is usually your first move. Most gas fireplaces have a front panel or grille that either unlatches, lifts off, or slides out. Think of it like opening the hood of your car – everything important is hidden behind there for safety and aesthetics.
Once you’ve got that front panel out of the way, you’ll see the control panel with all the important bits. The gas control valve is the big player here, along with the pilot knob. You’ll notice the gas control knob has a safety feature – it won’t turn from “ON,” “PILOT,” or “OFF” unless you press it down a bit first. This prevents accidental changes, which is definitely a good thing when we’re talking about gas!
Look for the flame adjustment knob, often marked “High/Low” or with simple plus and minus symbols. This little guy is usually hanging out right near the main gas valve, waiting to help you create the perfect ambiance.
Step 2: A Guide to Fireplace Flame Adjustment for Height
Getting your flame height just right is like finding the perfect volume on your stereo – you’ll know it when you see it. Fireplace flame adjustment for height is actually the easiest part of this whole process.
Turn on your fireplace to its normal operating mode first. You want to see what you’re working with before making any changes. Then, find that “High/Low” dial we talked about and make gradual adjustments. Think “gentle nudges” rather than big dramatic turns – your fireplace will respond better to small changes.
Turn it towards “High” to boost those flames up, or towards “Low” to bring them down to a more subtle level. The key word here is gradual. Make a tiny adjustment, watch what happens, then decide if you need more.
Observing flame changes is actually pretty satisfying. You’re aiming for flames that are 3-4 inches high coming off your logs or burners. This gives you that perfect balance of cozy warmth and visual appeal without looking like you’re trying to signal passing aircraft.
Step 3: Fine-Tuning the Flame Color via the Air Shutter
Now we’re getting to the really fun part – dialing in that gorgeous yellow-orange glow that makes everyone want to grab a cup of cocoa and settle in for the evening. The secret sauce here is understanding that flame color is all about the air-to-fuel ratio. More air gives you blue flames (which look a bit industrial), while less air creates those warm yellow and orange tips we’re after.
Locating the air shutter requires a bit of detective work. It’s typically hanging out at the end of the burner tube, where the gas and air decide to become best friends. You might need to get down and look around a bit – it’s often secured by a small screw that you’ll need to loosen.
Loosening the set screw is your next move, but don’t go crazy here. You just need it loose enough so the shutter can rotate – no need to remove it completely and risk losing it in the depths of your fireplace.
Here’s where the magic happens with adjusting the shutter. For more yellow and orange flames (which is probably what you want), gently rotate the shutter to close it slightly. This restricts airflow and gives you those warm, dancing flame tips. For bluer flames, do the opposite and open it up to let more air in. But honestly, unless you’re going for that modern, minimalist look, you’ll probably want to stick with the warmer colors.
Make very small adjustments and then just watch for a few minutes. Your fireplace needs time to show you what it’s got. Lowering the air input is usually the ticket to getting those orange and yellow tips that make your fireplace look like something out of a cozy cabin magazine.
Once you’ve got that perfect flame color dancing away, tighten the set screw back down to lock in your masterpiece. Step back and admire your handiwork – you’ve just transformed your fireplace from basic to beautiful!
Troubleshooting Common Flame Issues
Even when you follow all the right steps, your gas fireplace flames might still act up a bit. Don’t worry – this happens to everyone, and most issues have simple solutions that you can handle yourself.
Here’s something important I’ve learned from years of working with fireplaces: patience is your best friend when it comes to fireplace flame adjustment. After you make any changes to the gas controls or air shutter, you need to wait a full 30 minutes to see the real results. This waiting period allows your fireplace system to stabilize and show you the true effect of your adjustments.
During this waiting period, you might notice the flames gradually changing. That’s completely normal! The gas-to-air mixture needs time to reach its new equilibrium.
Uneven flames are one of the most common complaints I hear from homeowners. Usually, this happens when dust or debris blocks some of the burner ports while leaving others clear. You’ll see some areas with tall, robust flames while other spots barely flicker.
Weak flame output can make your fireplace feel more like a candle than the cozy centerpiece you want. This often stems from gas pressure issues or dirty components that restrict proper fuel flow.
Sooting is another red flag that tells you something’s not quite right with your combustion. If you notice black residue building up on your glass or logs, it typically means your flame is running too rich (not enough air) or too high. This incomplete combustion isn’t just unsightly – it can also affect your indoor air quality.
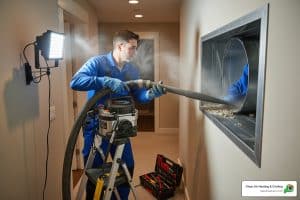
For thorough cleaning and maintenance that goes beyond basic adjustments, we offer professional fireplace cleaning services throughout the Bellingham area. Sometimes a good professional cleaning is exactly what your fireplace needs to get back to peak performance.
Why Are My Flames Blue (and How to Fix It)?
Blue flames can be frustrating when you’re trying to create that warm, cozy atmosphere. While blue flames are perfectly normal during the first few minutes of operation – think of it as your fireplace “warming up” – they shouldn’t stick around for the long haul.
If your flames stay predominantly blue after 30 minutes of operation, you’ve got too much oxygen mixing with your gas. This creates a very hot, efficient burn that’s great for heating but terrible for ambiance.
The most common culprit is an air shutter that’s open too wide. Air shutter we talked about earlier? If it’s letting in too much air, your flames will stay stubbornly blue no matter how much you adjust the gas flow. Try closing it incrementally – just small adjustments – and then wait that crucial 30 minutes between changes.
Check for drafts around your fireplace too. Sometimes external air currents can affect the combustion even when your air shutter is properly adjusted. This is especially common with direct vent systems where the outdoor air intake might be experiencing unusual wind patterns.
For vented gas fireplaces, make sure your damper is properly positioned. The damper should be fully open when you’re using the fireplace, and many units require a damper clamp to maintain a small opening even when “closed” for safety reasons.
What to Do for Weak or Low Flames
Nothing’s more disappointing than turning on your fireplace only to see sad, wimpy little flames that barely reach above the logs. Weak flames usually point to one of three main issues.
Low gas pressure is often the hidden culprit behind disappointing flame performance. Your fireplace needs consistent gas pressure – typically around 3.5 inches water column according to most manufacturer specifications – to create those robust, dancing flames you’re after. Even being off by just half an inch can dramatically impact flame height and appearance.
Dirty burner orifices are another common problem. These tiny holes where gas exits the burner can get clogged with dust, pet hair, or other debris over time. When some orifices are blocked while others aren’t, you get uneven, weak flames that never look quite right.
Blocked vents can also strangle your fireplace’s performance. For direct vent systems especially, any obstruction in the venting system – whether it’s a bird’s nest, leaves, or other debris – affects the airflow balance your fireplace needs for proper combustion.
While you can peek at the burner orifices to see if they look dirty, checking gas pressure requires specialized equipment like a manometer and the expertise to use it safely. If you suspect pressure issues or blocked venting, it’s definitely time to call in a professional for a proper gas pressure test.
For more complex issues or if you’re considering upgrading to a newer, more efficient unit, we also provide gas fireplace installation services throughout our service area.
Frequently Asked Questions about Fireplace Flames
Over the years, I’ve noticed that homeowners tend to ask similar questions about their gas fireplace flames. Let me share the most common concerns I hear and what you can do about them.
Can I adjust the flame color on my gas fireplace using the remote?
The answer really depends on what kind of remote system your fireplace has. Most modern gas fireplaces do let you adjust flame height using the remote, which can indirectly affect how your flames look. Some of the fancier systems might even give you more control over the air-to-fuel ratio, though that’s not as common.
If you’ve got a smart system like IntelliFire, you might be able to control various features right from your smartphone, including flame height. The IntelliFire App Setup & Help Videos can walk you through what’s possible with these systems. Pretty cool that voice control even works with Amazon Alexa and Google Assistant, though that’s just for turning the fireplace on and off.
Your owner’s manual is going to be your best friend here. It’ll tell you exactly what remote control features your specific model offers for fireplace flame adjustment.
What maintenance is required for healthy gas fireplace flames?
Keeping your flames looking their best really comes down to taking care of your whole fireplace system. I always tell my customers to have their appliance and venting system inspected by a qualified service person at least once a year. This makes sure nothing’s blocking the flow of combustion and ventilation air.
Between professional visits, there are some simple things you can do yourself. Cleaning the burner and control compartment with a brush and vacuum at least once a year helps prevent dust and debris from messing with your flame performance. If you notice a film building up on the glass, clean it with an approved gas fireplace glass cleaner.
Don’t forget about your gas logs either. Make sure they’re positioned exactly like your manual shows. When they’re not placed right, you can end up with sooting and flames that just don’t look right.
For a complete guide to keeping everything in tip-top shape, check out this Indoor Fireplace Maintenance Checklist. Trust me, regular maintenance really does make a difference in how your flames look and perform!
What should I do if adjusting the damper doesn’t change the flame color?
Sometimes, despite your best efforts with the damper or air shutter, those flames just won’t cooperate. If you’re still seeing stubbornly blue flames after that initial 30-minute burn-in period, it’s time to dig deeper.

Persistent blue flames often point to issues beyond simple airflow adjustment. One common culprit is low gas pressure. When the gas pressure is too low, your flames can stay blue and weak no matter what you do with the air shutter. Unfortunately, this isn’t something you can check yourself since it requires special tools like a manometer to measure the pressure accurately.
Another possibility is blocked burner ports or orifices. Those tiny holes where the gas comes out can get clogged over time, restricting gas flow and preventing your flames from developing that nice yellow-orange color we’re after.
Even if your damper seems fine, there might be an obstruction somewhere else in the venting system. That’s why we always recommend having the entire system inspected annually.
When you’ve tried all the basic fireplace flame adjustment steps and you’re still not getting the results you want, it’s time to call in a professional. We have the tools and experience to diagnose tricky issues like gas pressure problems or internal blockages that aren’t obvious to the naked eye. For expert help with these more complex issues, you can learn more about our fireplace and stove service options.
Conclusion: Keep Your Fireplace Burning Brightly and Safely
Learning fireplace flame adjustment might feel overwhelming at first, but you’ve now got all the tools you need to create those perfect dancing flames. We’ve covered everything from the crucial safety steps to the nitty-gritty of adjusting flame height and getting those gorgeous yellow-orange tips through air shutter adjustments.
This isn’t just about making your fireplace look pretty (though that cozy ambiance is definitely a nice bonus!). Proper fireplace flame adjustment ensures your unit runs efficiently and safely. When flames are properly balanced, you avoid problems like sooting, incomplete combustion, and wasted gas. Plus, you get the maximum warmth and comfort from your investment.
The key takeaways for success are patience after making adjustments – always wait that full 30 minutes to see the true results. Start with gradual changes to both the flame height control and air shutter. And most importantly, never skip the safety precautions we discussed at the beginning.
While many adjustments are perfectly safe for homeowners to tackle, knowing when to call for professional help is just as important as knowing how to make the adjustments yourself. If you’re dealing with persistent blue flames after 30 minutes, weak flame output that doesn’t improve with adjustments, or any concerns about gas pressure, it’s time to bring in the experts.
At Clean Air Heating & Cooling, we’ve been helping families throughout Whatcom, Skagit, Snohomish, and San Juan Counties get the most from their fireplaces for years. Whether you need annual servicing to keep everything running smoothly or help diagnosing tricky flame issues, we’re here to ensure your fireplace remains a source of warmth and joy, not worry.
Your fireplace should be the heart of your home’s comfort, especially during those chilly Pacific Northwest evenings. With proper adjustment and regular maintenance, you’ll enjoy years of cozy fires and peace of mind. For comprehensive care and expert service, check out More info about our professional fireplace services and let us help keep your flames burning bright and safe.