When Your Mini Split Does Not Cool: Quick Solutions at a Glance
When your mini split does not cool during hot summer days, the frustration is real. Your home should be a comfortable refuge, not a sweltering space that leaves you searching for relief.
Here are the most common reasons and immediate fixes:
Quick Troubleshooting Steps:
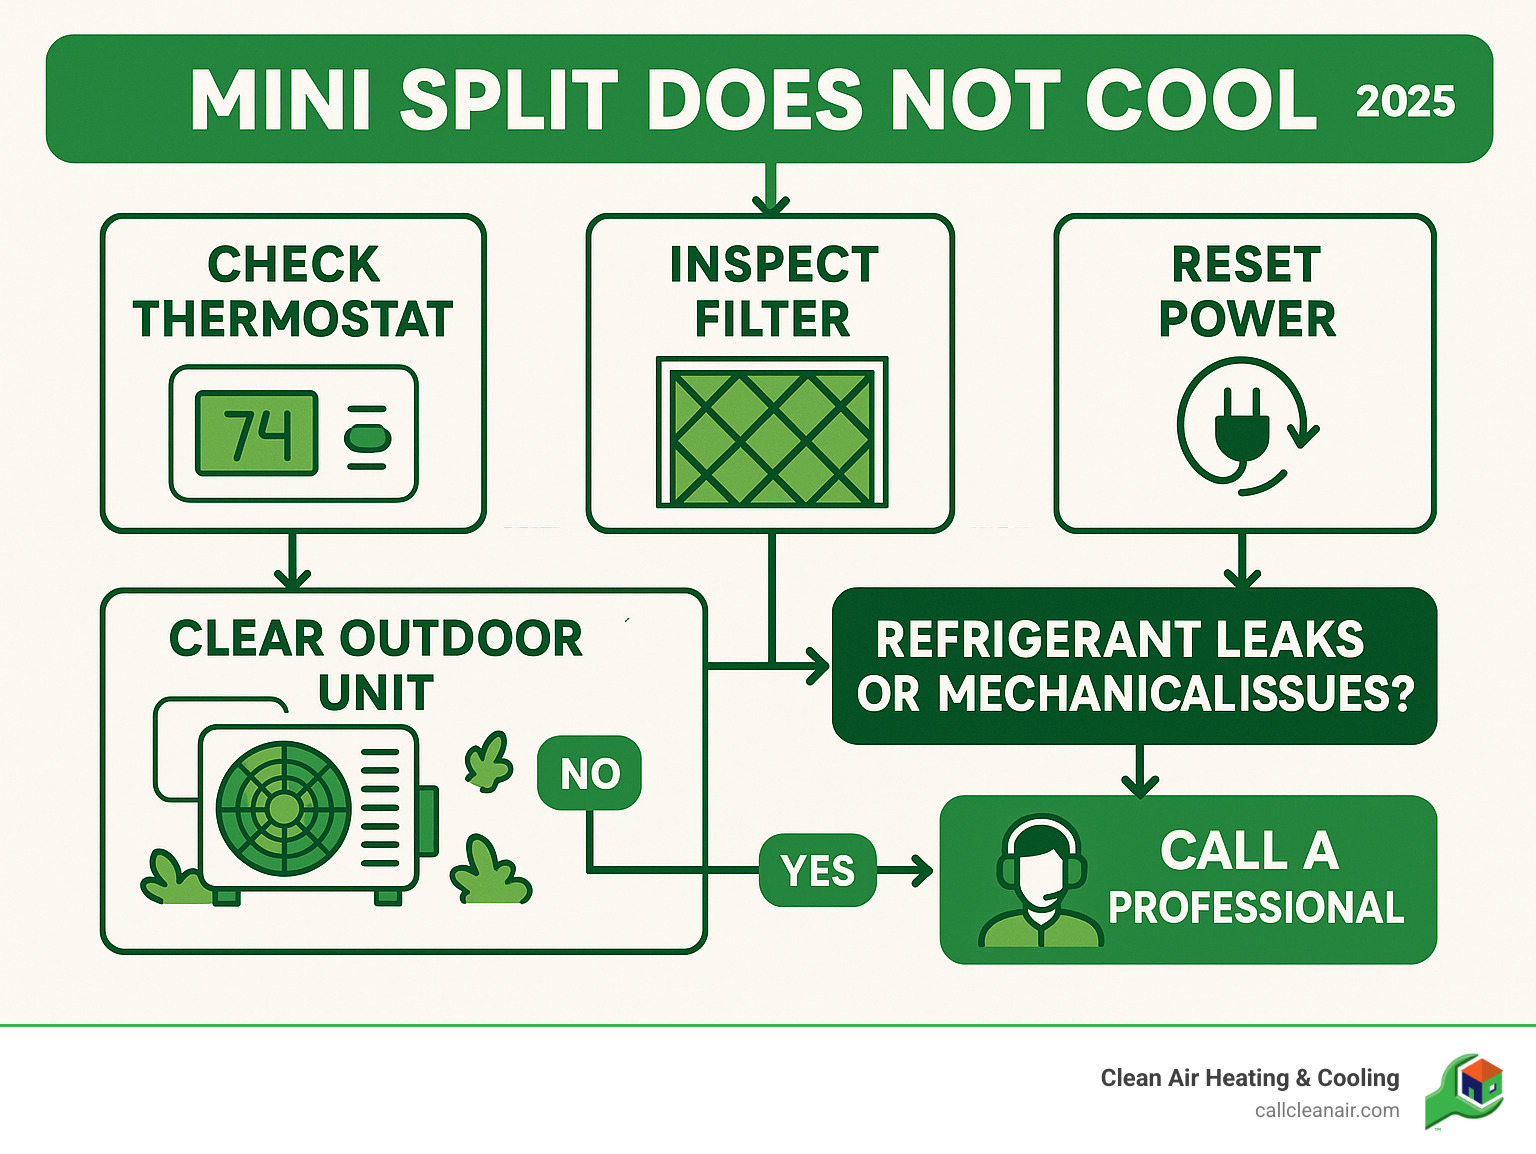
- Check thermostat settings – Ensure it’s set to “Cool” mode, not “Fan” or “Heat”
- Replace dirty air filter – Clean monthly when system runs regularly
- Reset the system – Turn off for 15 minutes, then restart
- Check circuit breaker – Look for tripped breakers in electrical panel
- Clear outdoor unit – Remove debris, leaves, or obstructions around condenser
When to Call a Professional:
- Refrigerant leaks (hissing sounds, ice buildup)
- Strange noises (grinding, clicking)
- System runs but produces no cold air after basic checks
- Water leaking inside your home
Most mini split cooling issues stem from restricted airflow due to dirty filters or blocked vents. However, problems like low refrigerant levels or compressor malfunctions require professional diagnosis and repair.
As Colin Matei, owner of Clean Air Heating & Cooling, I’ve helped countless homeowners in Bellingham and surrounding areas resolve situations where their mini split does not cool effectively. My experience has shown that catching these issues early prevents costly repairs and keeps your family comfortable year-round.
Start with the Basics: Simple DIY Troubleshooting Steps
When your mini split does not cool on a blazing summer day in Northwest Washington, don’t panic just yet. Before calling for help, there are some simple checks you can do yourself – think of them as the “have you tried turning it off and on again?” of the HVAC world.
Most cooling issues have surprisingly simple causes. Understanding How Do Ductless Mini Split Systems Work? helps you tackle these basic troubleshooting steps with confidence.
Check Your Thermostat and Remote Settings
You’d be amazed how often I get calls where the mini split does not cool, only to find it’s set to the wrong mode. It’s like expecting your car to move forward while it’s in reverse!
First, grab your remote control and check the mode setting. Your mini split should be on “Cool” – not “Fan,” “Dry,” or heaven forbid, “Heat.” Fan mode just circulates air without cooling it. Dry mode removes humidity but barely cools. And heat mode? Well, that’s the opposite of what you want on a hot day.
Next, look at your temperature setting. Set it at least 3-5 degrees lower than your current room temperature. If you set it at 75°F and your room is already 75°F, your mini split thinks its job is done. Also, make sure the fan is set to “Auto” rather than a specific speed – this lets the system optimize airflow for the best cooling.
Don’t forget about dead batteries in your remote. A dying battery can send weak or incorrect signals to your unit. If you have a programmable schedule set up, double-check that it’s not still running a winter heating program that’s fighting against your cooling needs.
For more detailed solutions, check out our guide on Mini Split Not Cooling: Causes and Solutions.
Inspect Power and Reset the Unit
Sometimes when your mini split does not cool, it’s not a cooling problem at all – it’s a power problem. Just like your smartphone occasionally needs a restart, your mini split might need the same treatment.
Start by checking your home’s electrical panel for a tripped circuit breaker. A tripped breaker will be flipped to the “off” position or stuck somewhere between “on” and “off.” Simply flip it all the way to “off,” then back to “on.”
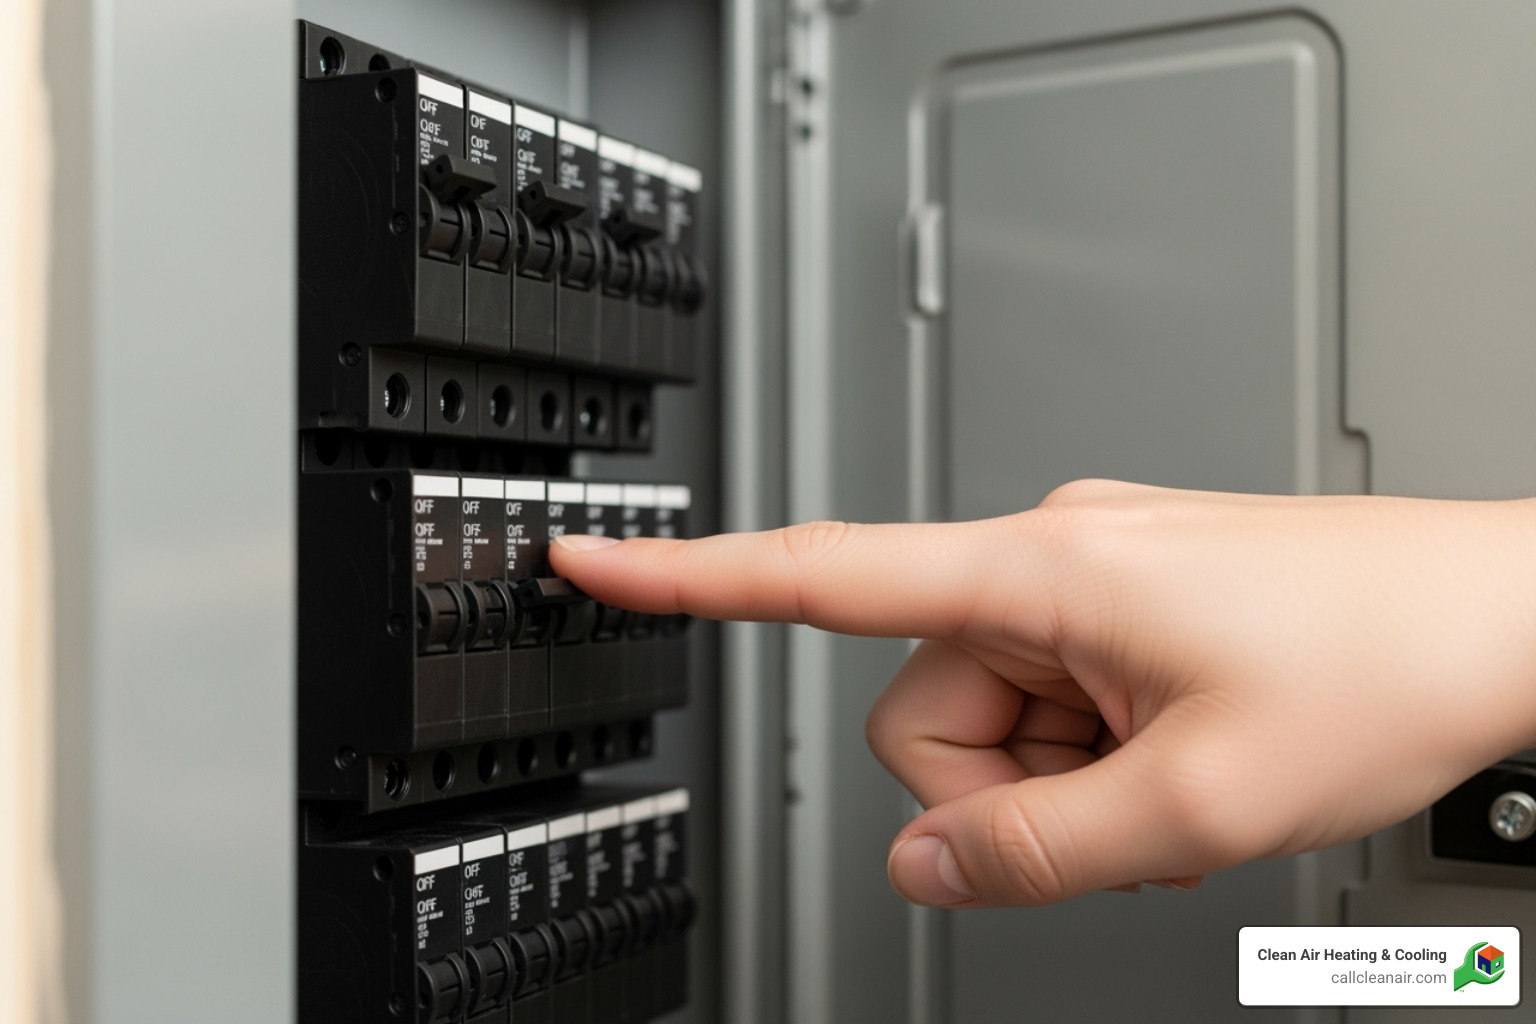
Also check the disconnect switch near your outdoor unit – make sure it’s in the “on” position.
If the power looks good, try a system reset. Turn off your mini split using the remote, then either unplug it or turn off its circuit breaker for about 15 minutes. This gives the internal components time to reset and clear any minor glitches. When you restore power and turn it back on, it’s like giving your system a fresh start.
Always consult your user manual for specific reset instructions, as different models may have their own procedures. This simple power cycle often works wonders and might save you a service call.
Why Your Mini Split Does Not Cool: Uncovering the Common Culprits
If the basic fixes don’t work when your mini split does not cool, it’s time to investigate further. Most cooling problems in Whatcom, Skagit, and Snohomish Counties stem from issues with airflow or heat transfer. Fortunately, many of these have straightforward DIY solutions.
The #1 Suspect: A Dirty Air Filter
A dirty air filter is the most common reason a mini split does not cool. The filter traps dust and other particles, but when it gets clogged, air can’t pass through easily, which severely restricts airflow.
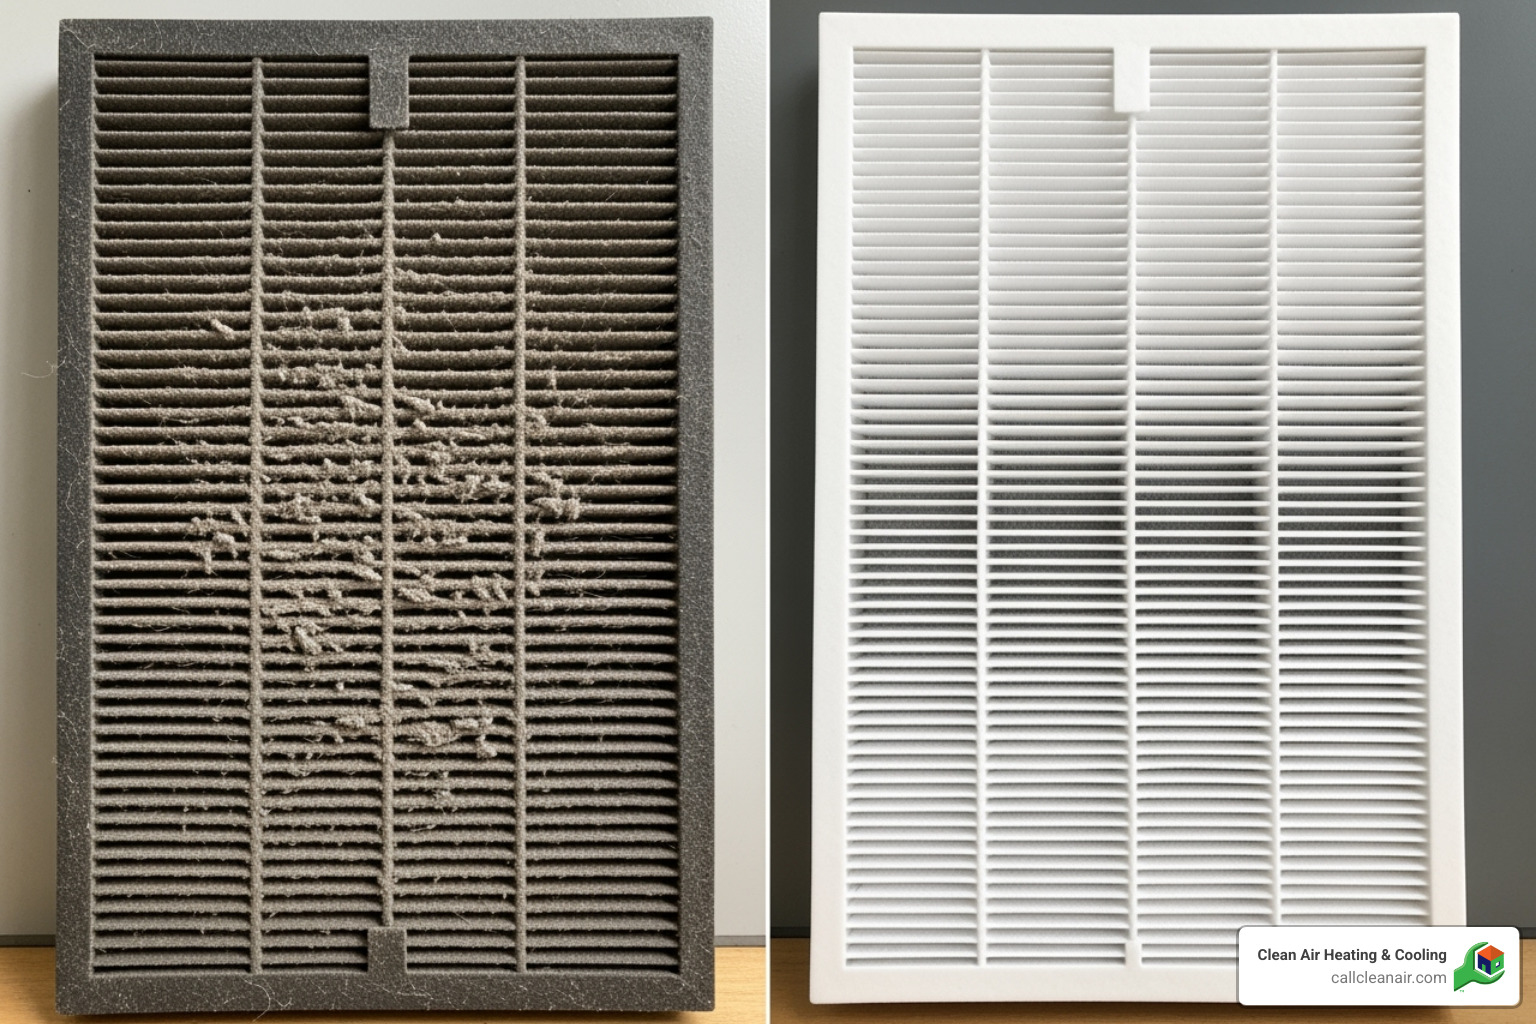
Restricted airflow leads to several problems: reduced efficiency (higher energy bills for less cooling), ice buildup on the indoor coil as it gets too cold, and component stress on the fan and compressor, which can shorten the system’s lifespan.
Cleaning your mini split filter is simple. First, turn off the unit. Open the front panel to reveal the filters. Remove the filters by sliding them out.
Clean the filters under lukewarm running water, using mild soap if needed. Dry them completely before reinserting them to prevent mold growth. Once dry, reinsert the filters and close the panel.
I recommend cleaning your filters monthly during peak cooling season, or more often if you have pets or smokers. Regular Cleaning Mini Split Heat Pump maintenance is the best way to prevent this common problem.
Blocked Airflow and Clogged Coils
Even with clean filters, other airflow issues can cause your mini split not to cool effectively. Both your indoor and outdoor units need clear paths for air to move freely.
Check that your indoor air handler isn’t blocked by furniture or curtains. The unit needs space to pull in warm air and push out cool air. Over time, the internal blower wheel can also collect dirt, making it harder to move air.
The outdoor condenser unit dumps heat from inside your home. It can’t do this if it’s blocked. Clear away debris like leaves and grass clippings from the coil fins. Trim back vegetation to maintain at least 2-3 feet of clearance around the unit, and remove any stored objects nearby.
Even with filter cleaning, tiny particles can build up on your system’s coils. Dirty evaporator coils (indoor) can’t absorb heat, while dirty condenser coils (outdoor) can’t release it. This buildup acts as an insulating layer, forcing the system to run constantly without cooling effectively.
Professional coil cleaning is essential for maintaining optimal Mini Split Cooling Efficiency.
What to Do When Your Mini Split Does Not Cool After Basic Checks
If you’ve checked settings, power, filters, and airflow, but your mini split does not cool, there are a few more possibilities.
Water leaks from the indoor unit often signal a clogged condensate drain line. As the mini split dehumidifies the air, condensation flows out through a drain line. If this line gets clogged with mold or debris, water backs up and overflows. While this doesn’t stop cooling directly, it can damage components or trigger safety shutdowns.
Improper sizing from the initial installation can also affect performance. A too-large unit will “short cycle,” cooling the room too quickly without removing humidity, leaving the air feeling sticky. An undersized unit will run constantly, struggling to reach the desired temperature and driving up energy costs.
If you suspect sizing is an issue, our team can help determine What Size Mini Split Do I Need? for your home in Bellingham and the surrounding areas.
When to Call a Professional: Signs of Serious Issues
Some problems are beyond DIY fixes. When your mini split does not cool despite your best efforts, or if you notice alarming signs, it’s time to call a qualified HVAC professional. Ignoring these signs can turn a manageable repair into a costly replacement. This is where our expertise in Ductless Mini Split Installation and repair truly shines.
Signs of a Refrigerant Leak
Refrigerant is the lifeblood of your mini split. If your system is low on refrigerant, it means there’s a leak, and your mini split does not cool effectively. It’s a closed system, so it never needs to be “topped off” unless there is a leak.
Here are the tell-tale signs of low refrigerant:
- Inadequate Cooling: The air from your unit isn’t cold, or it struggles to reach the set temperature.
- Hissing or Bubbling Sounds: A distinct hissing or gurgling noise from the unit or refrigerant lines indicates an active leak.
- Ice on Coils: Ice forming on the indoor evaporator coil or the outdoor refrigerant lines is a strong indicator of a leak, as low pressure causes the coil to over-cool.
- Sweet Smell: A slightly sweet or chemical smell can indicate leaking refrigerant.
- Increased Energy Bills: The system works much harder with low refrigerant, causing a spike in electricity use.
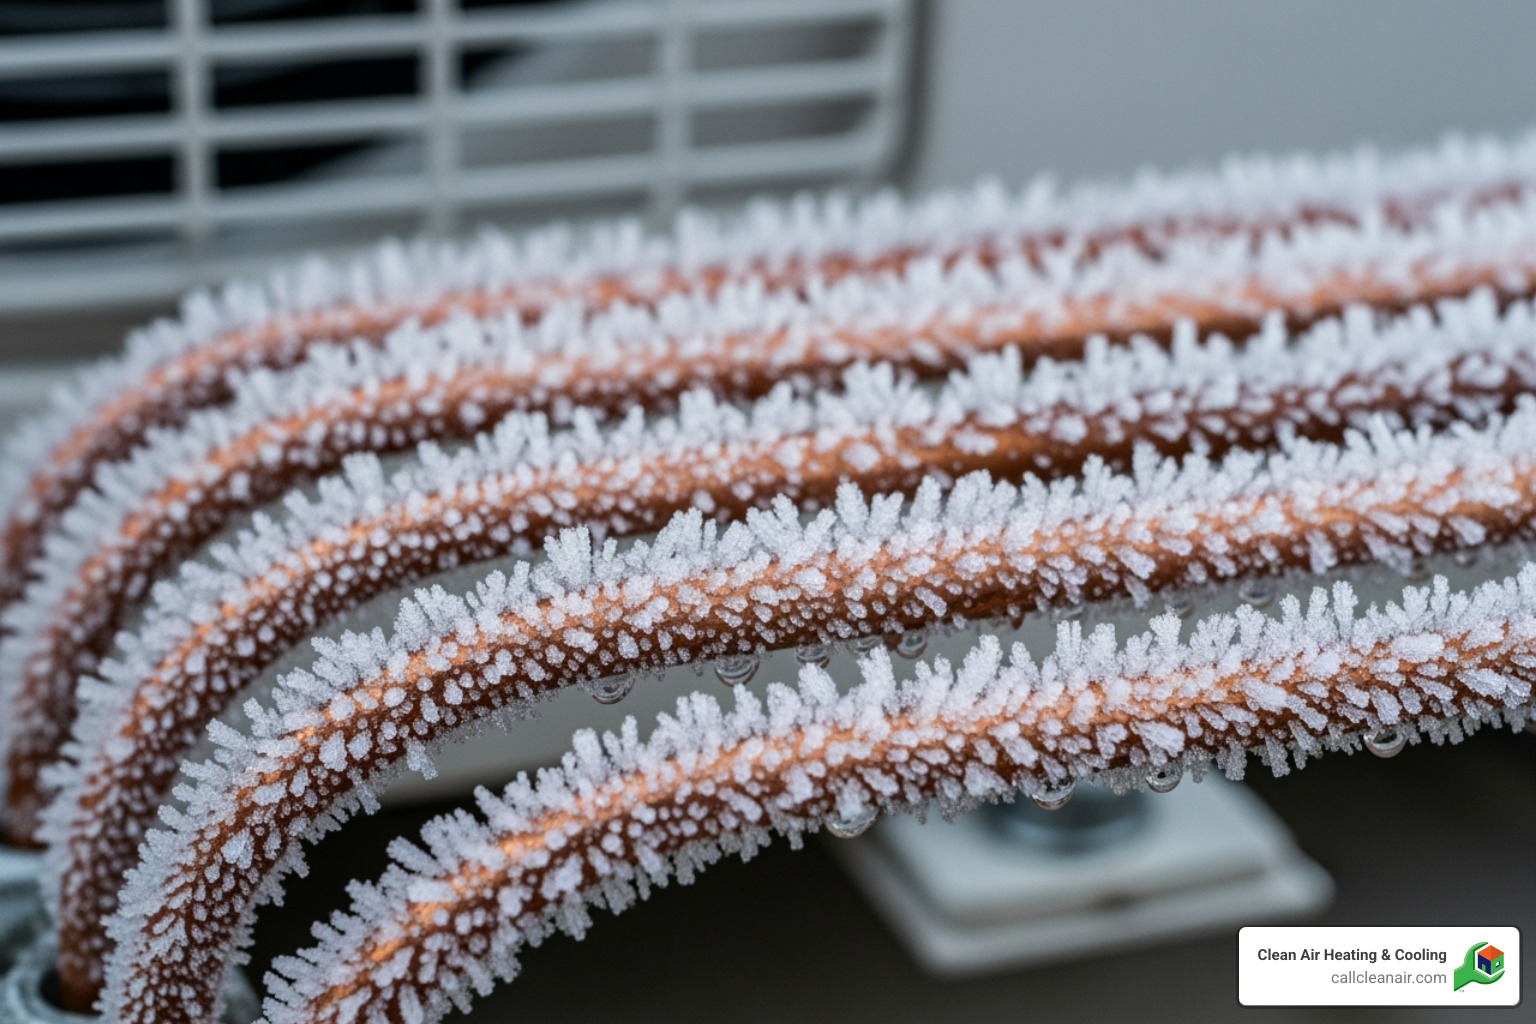
If you suspect a refrigerant leak, call a professional immediately. Refrigerants require special handling. A technician will find and repair the leak before recharging the system to the manufacturer’s specifications. Simply adding more refrigerant is a temporary, wasteful fix. Learn more about How to Identify and Fix Mini-Split Refrigerant Issues.
Malfunctioning Compressor and Other Internal Components
The compressor is the “heart” of your mini split, circulating refrigerant to enable cooling. If the compressor fails, your mini split does not cool because the entire cycle is compromised.
Signs of a malfunctioning compressor or other internal parts include:
- Strange Noises: Grinding, buzzing, clicking, or banging sounds can indicate a failing compressor, fan motor, or a faulty capacitor.
- System Won’t Start: If the unit won’t turn on or immediately shuts down, it could be a compressor failure or an electrical problem.
- Frequent Cycling (Short Cycling): The unit turning on and off in short bursts can be a symptom of a struggling compressor, though it can also be caused by other issues like low refrigerant or improper sizing.
- Overheating: A failing compressor or motor can cause the outdoor unit to overheat and shut down as a safety measure.
Diagnosing these issues requires specialized tools. Our certified technicians can pinpoint the exact problem, whether it’s a worn-out motor, a faulty sensor, or a failing compressor.
The Dangers of Ignoring a Mini Split Cooling Problem
When your mini split does not cool, ignoring the problem leads to more costly and inconvenient consequences. Here’s why you should act quickly:
- Skyrocketing Energy Bills: A struggling unit works harder, causing a significant spike in your electricity bills and negating its efficiency benefits.
- Premature Component Failure: Running a faulty system puts immense strain on its parts, accelerating wear and leading to premature failure of expensive components.
- Costly Repairs or Full System Replacement: A minor issue can escalate. An ignored refrigerant leak can burn out the compressor, potentially requiring a full system replacement instead of a simple repair. Neglect can drastically shorten your system’s 10-15 year average lifespan.
- Poor Indoor Air Quality: Dirty filters and coils can harbor mold and bacteria, which then circulate through your home, degrading air quality.
- Discomfort and Frustration: A malfunctioning unit fails to provide comfort, making your home hot and unpleasant.
Addressing issues early saves you money and stress. Consider our insights on How Long Do Mini Split Systems Last? to understand the value of proactive care.
Frequently Asked Questions about Mini Split Cooling Issues
Over the years, we’ve answered countless questions from homeowners throughout Whatcom, Skagit, Snohomish, and San Juan Counties who are dealing with cooling problems. Here are the most common scenarios we encounter when someone calls to say their mini split does not cool properly.
Why is my mini split running but not blowing cold air?
This has to be one of the most frustrating situations – you can hear your mini split humming away, the fan is clearly running, but the air coming out feels like a gentle summer breeze instead of the arctic blast you’re desperately hoping for. It’s like having a car that starts and makes all the right noises but refuses to move forward.
The most likely culprit is an incorrect thermostat mode. I can’t tell you how many service calls we’ve made where the homeowner had accidentally switched to “Fan” or “Dry” mode instead of “Cool.” It happens to the best of us, especially when multiple family members are adjusting the remote.
A severely dirty air filter is another common villain. When your filter is clogged beyond belief, it’s like trying to breathe through a thick blanket. The restricted airflow prevents your evaporator coil from doing its job of absorbing heat from your home’s air. Even worse, this can cause the coil to freeze solid, which completely blocks any cooling.
Low refrigerant levels due to a leak will also cause this problem. Your compressor might be working overtime, but without enough refrigerant to carry the heat away, you’re not going to get cold air. You might notice hissing sounds, ice buildup on the refrigerant lines, or that slightly sweet chemical smell we mentioned earlier.
Don’t overlook clogged coils either. Both your indoor evaporator coil and outdoor condenser coil need to be clean to transfer heat effectively. When they’re covered in dirt and debris, it’s like wrapping them in an insulating blanket – the system simply can’t do its job properly.
Why is my mini split leaking water inside?
Finding a puddle of water under your indoor unit can send anyone into panic mode. While this doesn’t directly prevent cooling, it’s definitely a red flag that something needs attention before it leads to bigger problems.
The number one cause is a clogged condensate drain line. During normal operation, your mini split pulls moisture out of the air, creating condensation that needs to drain away. When that tiny drain line gets blocked with algae, mold, or debris, the water has nowhere to go except onto your floor. Think of it like a sink with a clogged drain – eventually, it’s going to overflow.
A dirty filter causing coil freeze-up is another common scenario. When airflow is severely restricted, your evaporator coil can freeze into a solid block of ice. When the system finally shuts off or goes into defrost mode, all that ice melts rapidly, creating more water than your drain system can handle. It’s like dumping a bucket of water into a straw – it’s going to overflow.
Less commonly, you might have a cracked drain pan or installation issues where the unit doesn’t have the proper slope for drainage. These situations require professional attention to diagnose and fix properly.
How often should I clean my mini split filters?
This is honestly one of my favorite questions because it shows a homeowner who wants to take good care of their system! Regular filter maintenance is your best defense against having a mini split does not cool situation in the first place.
We recommend cleaning your filters monthly during active use – that’s when your system is working hard during summer cooling or winter heating seasons. It might seem frequent, but trust me, your mini split will thank you for it.
If you have pets that shed, smokers in the house, or you’re in a particularly dusty environment, you might need to check them even more often. Same goes if someone in your family has allergies or asthma – cleaner filters mean cleaner air for everyone.
The manufacturer’s recommendations in your user manual should always be your starting point, but monthly cleaning is a safe bet for most households. It’s such a simple task that takes maybe ten minutes, but it can save you from expensive repairs and keep your energy bills reasonable. Plus, you’ll breathe easier knowing your air is being properly filtered.
Stay Cool with Proactive Care and Expert Service
When your mini split does not cool properly, it’s often a sign that it needs attention. Proactive care is the best way to ensure your system runs reliably for years.
Regular maintenance is your secret weapon against cooling problems. Consistent care helps you invest in your home’s comfort and your wallet’s happiness.
A well-maintained mini split can last well beyond its typical 10-15 year lifespan, while neglected systems often fail prematurely. Proactive care also ensures peak energy efficiency, preserving the 30% savings mini splits offer over traditional systems and preventing high energy bills. Dirty components and low refrigerant quickly erase these gains.
Most importantly, regular maintenance prevents dreaded summer breakdowns. Professional visits can identify worn components and potential leaks before they leave you sweltering. Regular Mini Split Cleaning Service also improves your indoor air quality by ensuring clean coils and fresh filters.
At Clean Air Heating & Cooling, we’ve been keeping homes comfortable across Bellingham, Whatcom, Skagit, Snohomish, and San Juan Counties for years. Our team understands Northwest Washington’s climate and its impact on mini split performance. With over 480 five-star Google reviews and our 25% utility savings guarantee, we’re committed to delivering prompt, high-quality service.
Don’t wait until your comfort is compromised. If you’ve tried the troubleshooting steps and your mini split does not cool as it should, professional service is your best bet. Our technicians can diagnose issues quickly, perform thorough cleanings, and ensure your system is ready for any weather.
Ready to give your mini split the care it deserves? Schedule professional mini split services with us today and enjoy peace of mind knowing your home’s comfort is in expert hands.

