When it comes to maintaining a comfortable temperature in your home, ductless mini split installation is a game-changer. Ductless mini splits offer a flexible and energy-efficient solution for heating and cooling specific areas. If you’re pressed for time, here’s a quick answer:
- System Type: Choose between single-zone, dual-zone, or multi-zone systems based on room count.
- Components Needed: Includes outdoor condenser, indoor units, refrigerant lines, and power lines.
- Installation Steps: Mount air handlers, run line sets, connect refrigerant and electrical lines, and test the system.
- Professional Assistance: Necessary for some aspects, especially refrigerants.
Ductless mini split systems have two key parts: an outdoor condenser and indoor air handlers. This setup allows you to control the climate in different rooms independently without the need for expensive ductwork. Whether cooling a single room like a finished attic or multiple areas in your home, mini splits provide an efficient way to control your environment while keeping energy bills low.
I’m Colin Matei, Owner and President of Clean Air Heating & Cooling. With experience in ductless mini split installation, I am committed to helping homeowners like you achieve optimal home comfort and energy efficiency. Let’s explore how these systems work and how you can get started with an installation that suits your needs.

Understanding Ductless Mini Split Systems
Ductless mini split systems are a modern marvel in heating and cooling systems. They offer an innovative way to regulate the temperature in your home without the need for traditional ductwork. Here’s how they work and why they’re so effective.
Heating and Cooling Systems
At the heart of a ductless mini split system are two main components: the outdoor condenser and the indoor air handlers. The outdoor unit is responsible for pumping cooled or heated air into your home. Each indoor unit, often mounted on the wall or ceiling, circulates this air in individual rooms or zones. This setup allows for precise temperature control in each area, making it ideal for homes with varying heating and cooling needs.
Air Redistribution
One of the standout features of ductless mini splits is their ability to redistribute air efficiently. Unlike traditional HVAC systems that rely on a network of ducts, mini splits use small refrigerant lines to connect the indoor and outdoor units. This not only eliminates the risk of leaky ducts but also ensures that air is delivered directly to where it’s needed most. Each indoor unit has its own thermostat, so you can tailor the climate to suit each room’s occupants and activities.
Energy Efficiency
Energy efficiency is where ductless mini splits truly shine. By eliminating ductwork, these systems reduce energy loss, which can account for up to 30% of energy consumption in traditional systems. Additionally, because each zone can be controlled independently, you’re not wasting energy heating or cooling unoccupied spaces. This targeted approach can lead to significant savings on your energy bills.

Ductless mini split systems provide a flexible, efficient, and cost-effective solution for home climate control. Whether you’re looking to heat a single room or cool multiple zones, these systems offer the versatility and performance you need. As we dig deeper into the installation process, you’ll see just how straightforward it can be to bring this technology into your home.
DIY Ductless Mini Split Installation
Installing a ductless mini split system can be a rewarding project for those who are handy around the house. However, it’s important to approach this task with a clear understanding of the necessary steps and precautions.
DIY Installation
While some homeowners may opt for a professional installation, a DIY approach is possible with the right preparation. Before you begin, ensure you have the necessary tools and a basic understanding of electrical work. If you’re not comfortable with this aspect, it might be wise to hire a professional for the electrical connections.
Electrical Work
A ductless mini split typically requires a dedicated 20-amp circuit. This means you’ll need to run a new electrical line from your breaker box to the outdoor unit. If you’re not experienced with electrical work, it’s crucial to consult with a qualified electrician to ensure safety and compliance with local codes.
Placement Considerations
Choosing the right location for both the indoor and outdoor units is key. The easiest installations occur when the indoor unit is mounted on an exterior wall. This minimizes the distance the refrigerant lines need to run, simplifying the process.
For multi-room systems, consider the layout of your home and the areas that require heating or cooling. The placement will affect the efficiency and effectiveness of your system.
Warranty Implications
Be aware that some manufacturers, such as MRCOOL, may only honor their warranty if the unit is installed by a licensed professional. It’s important to check the warranty terms before proceeding with a DIY installation to avoid any potential issues.
Safety Precautions
Safety should always be your top priority. Here are a few key precautions:
- Heights and Ladders: If you’re installing the unit on an upper floor, ensure you have a sturdy ladder or, preferably, scaffolding for safety.
- Handling Refrigerant: Properly handling refrigerant lines is crucial. Mishandling can lead to leaks, which are not only inefficient but can also be hazardous.
- Secure Mounting: Make sure both the indoor and outdoor units are securely mounted to prevent any accidents or damage.
By carefully considering these factors and taking the necessary precautions, you can successfully install your ductless mini split system and enjoy the comfort it brings to your home. Now, let’s dive into the step-by-step installation process, where we’ll guide you through each stage to ensure a smooth and efficient setup.
Step-by-Step Installation Process
Installing a ductless mini split system involves several critical steps. Each one is important to ensure your system works efficiently and safely. Let’s walk through the process.
1. Air-Handling System Mount
Start by installing the mount for your indoor air-handling unit. These units can weigh between 40-50 lbs, so it’s crucial to secure the bracket to at least two wall studs for stability. If you can’t find studs, use high-quality drywall anchors.
2. Drill the Line Set Hole
Next, drill a pilot hole where the line set will connect to the indoor unit. This hole should angle slightly downward to ensure proper drainage of condensate. Once the pilot hole is ready, clear out any debris and drill a full-size hole through the wall. You may need to finish the hole from the outside to ensure a clean path.
3. Run the Line
Have someone inside the house feed the line set through the hole to the outside. The person outside should gently bend the line set to follow the wall, leading to the outdoor condenser. Secure the connection with electrical tape to prevent leaks.
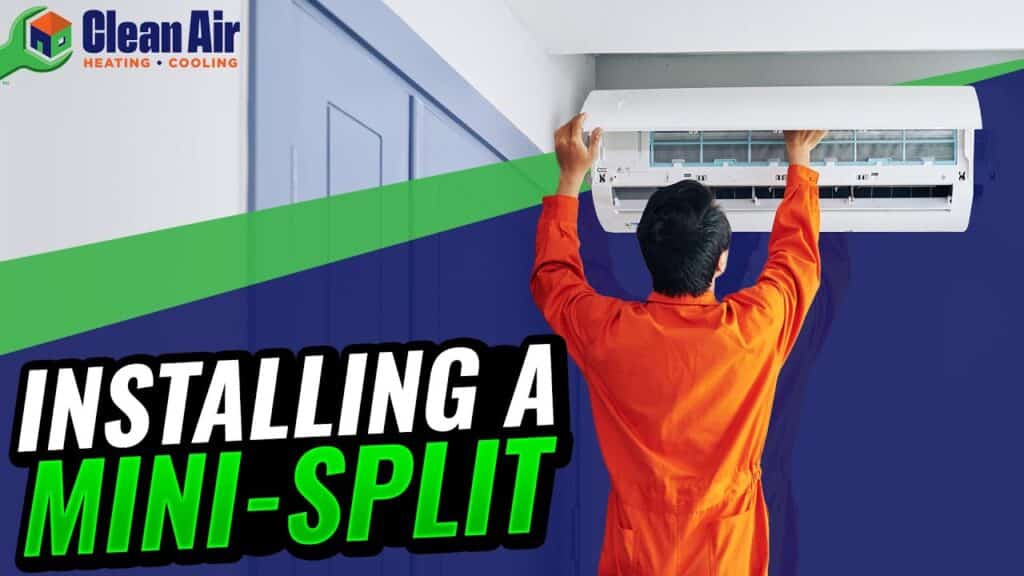
4. Mount the Air-Handling Unit
Lift the air-handling unit onto the installed mount. Depending on the weight and your strength, you might need a second person to help with this step. Ensure it’s securely fastened to avoid any accidents.
5. Install Outdoor Condenser Unit
Attach a bracket system to the side of your house where you’ll place the condenser unit. For optimal cooling efficiency, install it on the east or north side of your home.
6. Open up the Refrigerant Lines
This step varies by brand, but typically involves flipping a locking lever to connect the refrigerant lines. Make sure to follow the manufacturer’s instructions closely.
7. Power Up Your System
Connect the system to power and test it by setting a cooler temperature. You should feel cool air blowing from the air-handling unit. If not, double-check all connections.
8. Cover the Line Set
Finally, cover the line set with a protective channel, either plastic or metal. This not only safeguards the line but also improves the appearance of your installation.
By following these steps, you can ensure a successful ductless mini split installation. Now that you have one room covered, let’s explore how to expand this setup to multiple rooms for a more comprehensive solution.
Multi-Room Mini Split Systems
Expanding your ductless mini split installation to cover multiple rooms can improve your home’s comfort. Multi-room systems, also known as multi-zone systems, allow you to control the temperature in different areas independently. This flexibility is perfect for homes with diverse heating and cooling needs.
Multiple Indoor Units
A multi-room system involves using several indoor air-handling units. Each unit is installed in a different room or zone. This setup allows you to customize the climate in each space, tailoring it to individual preferences or specific room usage. For example, keep the bedroom cooler while maintaining a warmer temperature in the living room.
Outdoor Condenser Connections
All indoor units connect to a single outdoor condenser unit. This central unit is the powerhouse that supports multiple air handlers. The key is to ensure your outdoor condenser has the capacity to handle the total load of all connected indoor units. Manufacturers often provide guidelines on how many indoor units a condenser can support, based on its BTU capacity.
Installation Considerations
- Placement: Position the outdoor unit in a location that minimizes the distance to all indoor units. This reduces the length of refrigerant lines needed, potentially saving on installation costs.
- Connections: Each indoor unit requires a set of refrigerant lines running to the outdoor condenser. Properly insulating these lines is crucial to maintain efficiency and prevent energy loss.
- Electrical Requirements: Ensure your home’s electrical system can handle the additional load. Each indoor unit will need a power source, and the outdoor unit will have specific voltage requirements.
Benefits of Multi-Zone Systems
- Energy Efficiency: Only heat or cool the rooms you’re using. This targeted approach can lead to significant energy savings.
- Personalized Comfort: Different family members can set their preferred temperatures in their own spaces.
- Reduced Wear and Tear: By not overworking a single unit, you can extend the lifespan of your HVAC system.

By understanding the components and benefits of multi-room systems, you can make informed decisions about expanding your ductless mini split setup. Next, let’s address some common questions people have about ductless mini split installation.
Frequently Asked Questions about Ductless Mini Split Installation
Can I install my own ductless mini split?
Yes, you can install your own ductless mini split, but there are a few things to consider. DIY installation can be a great option if you’re handy and have some experience with home improvement projects. However, it involves electrical work, which may require a dedicated 20-amp circuit. If you’re not comfortable with electrical tasks, it’s best to hire a professional. That some manufacturers only honor warranties if the system is installed by a licensed HVAC contractor. So, weigh the pros and cons before deciding to go the DIY route.
What are the disadvantages of a ductless mini split?
While ductless mini splits offer many benefits, there are some drawbacks to consider:
- Initial Cost: The upfront cost can be significant, ranging from $1,000 to $4,000, depending on the type and number of units.
- Space Requirements: Each room will have a visible air handler, which might not be ideal if aesthetics are a priority.
- Maintenance: Although lower than traditional systems, mini splits still require regular maintenance to ensure efficiency.
Despite these drawbacks, many homeowners find the energy savings and comfort benefits outweigh the initial investment and space considerations.
How many square feet can a ductless mini split cool?
The cooling capacity of a ductless mini split depends on its BTU rating. Here’s a quick guide:
- 12,000 BTU: Cools approximately 400-500 square feet.
- 24,000 BTU: Covers about 1,000-1,200 square feet.
- 36,000 BTU: Suitable for 2,000-2,400 square feet.
If you have multiple rooms to cool, you might need a multi-zone system with several indoor units connected to a single outdoor condenser. This setup allows you to efficiently manage the climate in different areas of your home, ensuring maximum comfort and energy efficiency.
Understanding these aspects can help you make the best decision for your home’s heating and cooling needs.
Conclusion
Choosing the right HVAC system is crucial for maintaining comfort and efficiency in your home, and Clean Air Heating & Cooling is here to help you every step of the way. Our commitment to customer satisfaction is reflected in our 25% utility savings guarantee, ensuring that you not only stay comfortable but also save money on your energy bills.
We pride ourselves on delivering high-quality service with a personal touch. Our team is quick to respond, shows up on time, and performs work to the highest standards. This dedication has earned us over 480 5-star Google reviews, highlighting our reputation for excellence in Bellingham, WA, and surrounding areas.
Whether you’re considering a ductless mini split installation or need assistance with an existing system, our experts are ready to provide professional advice and support. We understand the unique needs of each home and work with you to find the best solutions custom to your specific requirements.
For more information on how we can help you achieve a comfortable and energy-efficient home, visit our mini-split services page. Let us show you why so many homeowners trust Clean Air Heating & Cooling for their HVAC needs.


