
Mini split installation tips are your gateway to changing any home into a haven of year-round comfort. These versatile, energy-efficient systems provide both heating and cooling, adapting seamlessly to the changing seasons. Unlike traditional systems, mini-splits require no ductwork and can be installed just about anywhere, making them perfect for additions, remodels, or areas where access to existing HVAC systems is tricky. Plus, their zoning capability allows for personalized comfort in each room, ensuring everyone’s needs are met.
Here’s a quick breakdown of the essentials to consider for a successful mini split installation:
- Proper Sizing: Avoid oversized units by performing a comprehensive load calculation.
- Optimal Placement: Carefully choose indoor and outdoor unit locations to maximize efficiency and minimize noise.
- Electrical Work: Ensure electrical connections are safe and compliant with local codes.
- Condensate Management: Plan effective condensate drainage to prevent water damage.
- Regular Maintenance: Keep filters clean and schedule check-ups for longevity and performance.
As Colin Matei, owner of Clean Air Heating & Cooling and an expert in HVAC systems, I’m committed to providing the best mini split installation tips to improve comfort and efficiency in homes across Northwest Washington. My experience in the field empowers me to offer insights that are not just practical, but also custom to the unique needs of each customer.
Mini split installation tips terms to know:
– Ductless mini split installation
– Mini split cooling efficiency
– Mini split installation companies
Understanding Mini Split Systems
Mini-split systems are a modern marvel in home climate control, offering both heating and cooling without the need for ductwork. Let’s explore the key components that make these systems so effective.
Split System Components
At the heart of a mini-split system are two main components: the indoor unit and the outdoor unit. These units work together to regulate your home’s temperature efficiently.
Indoor Unit
The indoor unit is the part you’ll see inside your home. It blows conditioned air into the room and is typically mounted on the wall, floor, or ceiling. This unit is equipped with a fan and an evaporator coil, which absorbs heat from the room during cooling.
Outdoor Unit
The outdoor unit is the powerhouse of the system. It contains the compressor and condenser coil, responsible for releasing the heat absorbed from inside your home to the outside air. Despite its power, the outdoor unit is compact and can be placed away from noise-sensitive areas, ensuring quiet operation.
Refrigerant Lines
Connecting the indoor and outdoor units are the refrigerant lines. These lines carry refrigerant, a special fluid that absorbs and releases heat, allowing the system to cool or heat your home. The lines are made of copper and are typically insulated to improve efficiency and prevent energy loss.

Why Mini Splits?
- No Ducts Needed: Unlike traditional HVAC systems, mini-splits don’t require ducts, eliminating the risk of duct leaks and saving energy.
- Flexible Installation: They can be installed in virtually any space, making them ideal for home additions or rooms without existing ductwork.
- Zoning Capabilities: You can control the temperature in different rooms independently, ensuring personalized comfort.
Understanding these components and their functions is crucial for a successful installation. By knowing what each part does, you can appreciate how mini-splits offer efficient and customizable comfort solutions for your home.
Mini Split Installation Tips
Indoor Unit Placement
When it comes to installing the indoor unit of a mini-split system, location is key. Proper placement ensures efficient air distribution and minimizes noise, keeping your space comfortable and serene.
1. Air Distribution:
The indoor unit should be positioned to allow even air distribution throughout the room. Avoid placing it where furniture or walls might block airflow. Manufacturers provide design literature that can guide you in selecting the optimal location for air coverage.
2. Noise Considerations:
Though mini-split systems are known for their whisper-quiet operation, placing the unit too close to where people frequently sit or sleep can still cause discomfort. It’s best to install the unit at a distance from beds or seating areas to prevent any potential noise disturbances.
3. Customer Preferences:
Always verify the placement with the homeowner before installation. Misalignment between what you plan and what the customer expects can lead to dissatisfaction. A brief discussion can ensure that the unit is installed in a spot that meets both functional and aesthetic preferences.
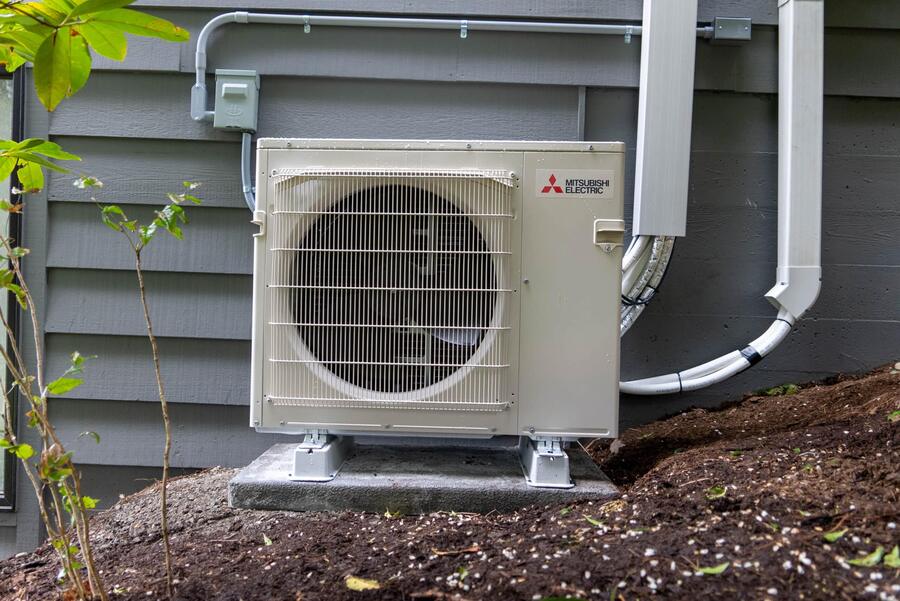
Outdoor Unit Placement
The outdoor unit’s placement is equally crucial for the system’s performance and longevity. Adhering to clearance guidelines and considering environmental factors can make a significant difference.
1. Clearances:
Adhering to the manufacturer’s specified clearances around the outdoor unit is non-negotiable. These clearances ensure adequate airflow, which is essential for the unit’s efficiency and longevity. If space is tight, get creative with placement while maintaining these crucial distances.
2. Airflow:
Poor airflow can reduce the system’s capacity and lead to issues like nuisance shutdowns or premature failure. Ensure that the outdoor unit is not placed in a cramped area or surrounded by obstructions like walls or dense shrubbery.
3. Noise-Sensitive Areas:
While the outdoor unit is designed to be quiet, positioning it away from bedrooms or living areas can help prevent any noise from becoming a disturbance. Consider installing it in a location where any operational sound is least likely to affect the home’s occupants.
By following these mini split installation tips, you ensure that both the indoor and outdoor units operate efficiently and quietly, providing optimal comfort for your home. Proper placement is not just a technical requirement; it’s a foundation for customer satisfaction and system performance.
Electrical and Wiring Considerations
When installing a mini-split system, attention to electrical and wiring details is crucial. Proper setup ensures the system operates efficiently and minimizes potential issues.
New Electrical Wiring
- Dedicated Circuit:
Each mini-split system requires a dedicated electrical circuit. This prevents overloads and ensures the system gets the consistent power it needs. Always check local electrical codes to ensure compliance. - Power Wiring and Communication Wire:
Mini-split systems often use a combined cable for power and communication. This setup simplifies installation but requires careful handling. Ensure that the wiring is intact and free from hidden splices, as these can cause communication errors between the indoor and outdoor units. - Polarity Sensitivity and Digital Communication:
Pay attention to polarity when connecting wires. Incorrect polarity can disrupt the digital communication between units, leading to system malfunctions. Always refer to the manufacturer’s manual for specific wiring instructions.
Line-Set Installation
- Line-Set Lengths:
The length of the refrigerant lines is critical. Manufacturers specify minimum and maximum lengths to ensure optimal performance. Lines that are too long can reduce efficiency, while those that are too short may cause compressor issues. - Refrigerant Charge:
Mini-split systems come pre-charged with refrigerant, but the charge may need adjustment based on line-set length. Ensure the refrigerant is properly measured and adjusted using a digital scale for accuracy. - Leak Prevention:
Leaks are a common issue in mini-split installations. A leak-free system is essential for efficiency and longevity. Use quality flare connections and conduct a thorough pressure test with nitrogen, as recommended by manufacturers, to check for leaks.

By following these mini split installation tips, you ensure a reliable and efficient system. Proper electrical and line-set considerations are foundational to a successful installation, contributing to the overall performance and customer satisfaction.
Condensate Management
Managing condensate effectively is crucial for the smooth operation of a mini-split system. Proper condensate management prevents water damage and ensures the system runs quietly and efficiently.
Condensate Piping
- Gravity Drains:
Gravity drains are the simplest and most reliable way to manage condensate. Ensure the drain line has a consistent downward slope, or pitch, to allow water to flow naturally away from the unit. This prevents water from pooling and causing potential damage. - Condensate Pumps:
When gravity drainage isn’t possible, a condensate pump is necessary. These pumps actively move water from the unit to a suitable drainage location. It’s important to place the pump in an area where noise won’t be a disturbance. Consider the sound level of the pump, as some can be quite loud during operation. - Insulation:
Insulating the condensate line is vital, especially in areas where temperature fluctuations can cause condensation on the outside of the pipe. Use appropriate insulation materials to prevent water from dripping onto ceilings or floors, which could lead to water damage or mold growth. - Drain Pitch and Condensate Traps:
A proper drain pitch is essential for gravity drains. Aim for a minimum pitch of 1/8 inch per foot to ensure effective drainage. Incorporate condensate traps to prevent the backflow of air, which can disrupt drainage and cause noise issues. - Noise Considerations:
Condensate management systems, especially pumps, can generate noise. Position the pump and piping in a way that minimizes noise transmission to occupied spaces. Use vibration dampeners and soundproofing materials where necessary to keep noise levels low.
By focusing on these aspects of condensate management, you can ensure that your mini-split system operates efficiently and quietly. Properly managing condensate not only prevents potential water damage but also contributes to the overall satisfaction of the system’s performance.
Frequently Asked Questions about Mini Split Installation
Where should you not install a mini split?
Avoid direct sunlight and heat sources:
Placing a mini-split system in direct sunlight can lead to inaccurate temperature readings. The system might work harder than necessary, consuming more energy and reducing efficiency. Similarly, avoid installing the unit near heat sources like stoves or ovens, which can cause the system to overcool the space.
Steer clear of obstructions:
To ensure efficient airflow, do not install the mini-split behind furniture or other obstructions. These barriers can block air distribution, making it difficult for the system to effectively cool or heat the room. Aim for a clearance of at least one meter from any obstructions.
What is the rule of thumb for ductless mini splits?
High wall placement for even air distribution:
For optimal performance, install the indoor unit high on the wall. This position allows for better air circulation throughout the room, ensuring even distribution of conditioned air. High placement also helps in reducing noise levels, as the sound is less noticeable when it’s above ear level.
How far off the wall should a mini split be?
Centrally located with appropriate height recommendations:
When installing a mini-split, aim to position it centrally within the room for balanced air distribution. The unit should be mounted at a height that allows for unobstructed airflow—usually about 7 to 8 feet from the floor. This height ensures that the air can flow freely across the room, avoiding pockets of hot or cold air.
By following these mini split installation tips, you can ensure your system is set up for maximum efficiency and comfort. Proper placement is key to enjoying the full benefits of your mini-split system.
Conclusion
At Clean Air Heating & Cooling, we understand that installing a mini-split system is not just about adding a heating or cooling unit to your home. It’s about enhancing your comfort and ensuring energy efficiency. Our team is committed to providing high-quality service that meets your specific needs.
Customer satisfaction is at the heart of what we do. With over 480 5-star Google reviews, our reputation speaks for itself. We pride ourselves on being quick to respond, showing up on time, and delivering top-notch workmanship. Our services are designed to ensure that your mini-split system operates seamlessly, providing year-round comfort with minimal fuss.
Whether you’re in Whatcom, Skagit, Snohomish, or San Juan Counties, we’re here to help. By choosing Clean Air Heating & Cooling, you’re not just getting a service provider; you’re gaining a partner dedicated to improving your home’s climate control. Our promise is to deliver installation and maintenance services that you can depend on, backed by our 25% utility savings guarantee.
For more information about our services in Bellingham, WA, and to learn how we can assist with your mini-split installation, visit our Bellingham HVAC Services page.
With Clean Air Heating & Cooling, you can rest assured that your comfort is in expert hands.